

Canned goods are pantry essentials, but they can quickly become a jumble of forgotten ingredients, duplicate purchases, and hard-to-reach tins. I love organizing them in ways that make the most of every inch while keeping everyday cooking effortless. These 12 pantry organization ideas for cans explore different solutions, from compact countertop-style risers to clever cabinet systems and beautifully arranged walk-in pantries, so you can find an approach that fits your space, shopping habits, and budget.
Tiered Shelf Risers for a Compact, Colorful Pantry
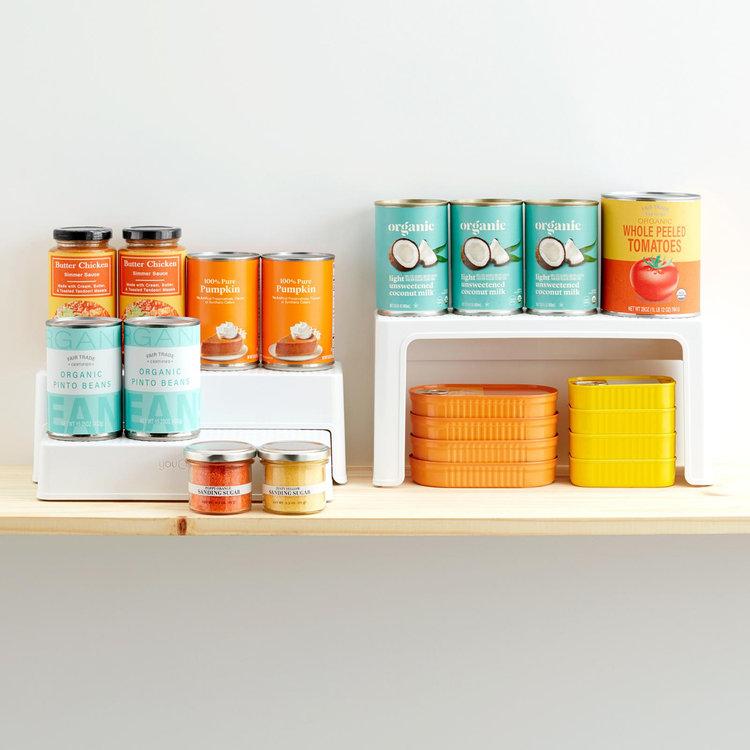
Give every can a front-row seat. Tiered shelf risers are one of my favorite solutions for shallow cupboards and small pantries because they raise the cans at the back instead of allowing them to disappear behind the front row. This compact arrangement makes it easier to identify ingredients at a glance, whether you are reaching for pumpkin purée, beans, tomatoes, or coconut milk.
The design works particularly well when the shelf is too narrow for a bulky organizer but tall enough to accommodate two or three levels. White risers create a clean, understated backdrop, while colorful labels and packaging add their own visual interest.
- Group by use: Keep baking cans together, with beans and vegetables in separate clusters.
- Check shelf clearance: Measure the space above the shelf before buying a riser.
- Keep heavy cans low: Reserve upper tiers for smaller, lighter tins.
For a polished result, arrange cans with labels facing forward and leave a little breathing room between categories. You do not need matching packaging; a consistent layout is enough to make a mixed collection look intentional.
Pull-Out Can Dispensers for Deep Cabinets
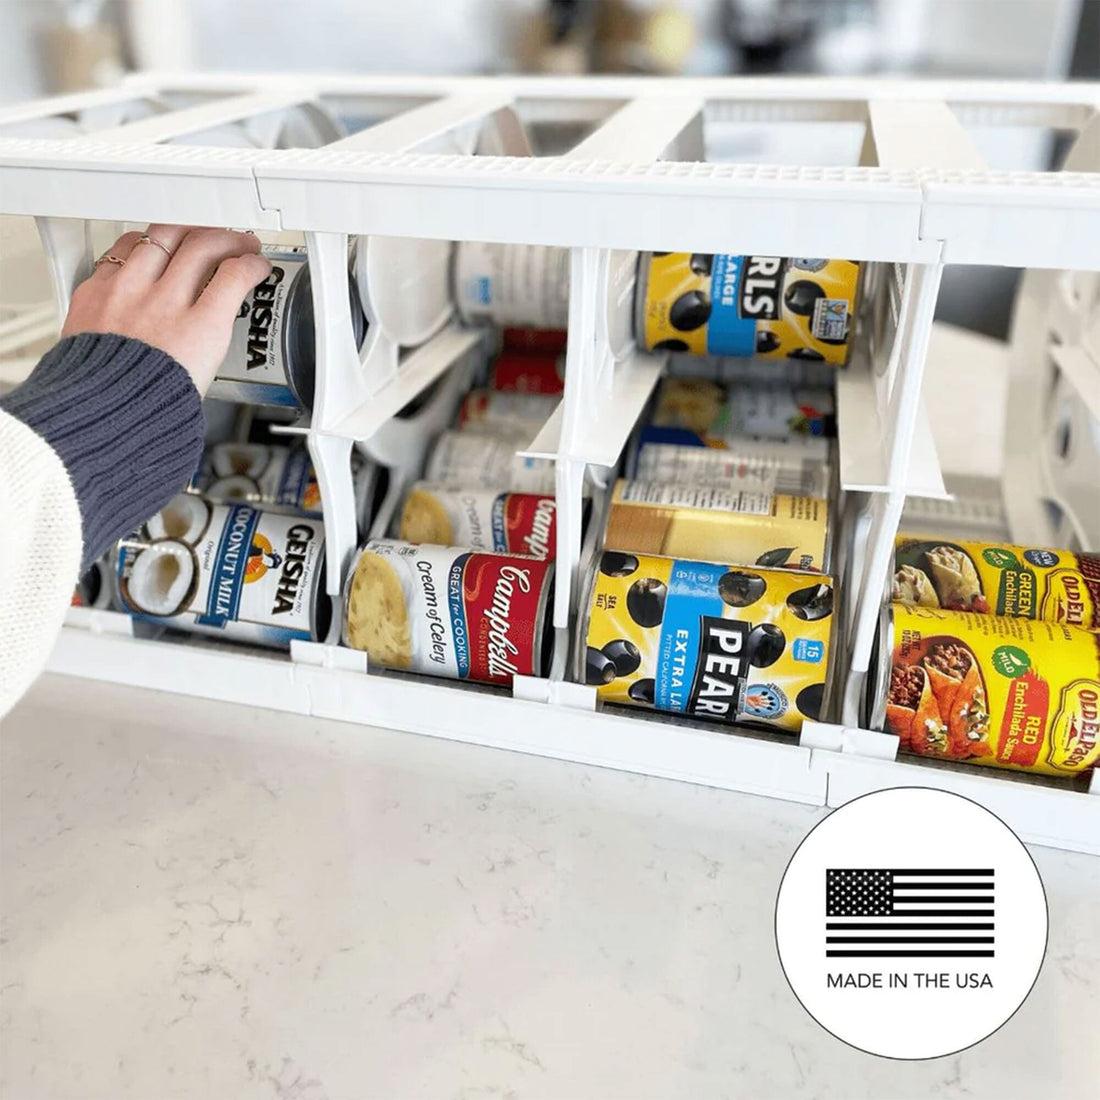
Turn a deep cupboard into an accessible inventory. A pull-out can dispenser uses sloped channels or individual compartments to keep cans organized while bringing them closer to the cabinet opening. Instead of reaching past several layers of tins, you can retrieve what you need and see what remains in each lane.
This approach is especially useful for households that buy pantry staples in multiples. Dedicate one channel to a frequently used item, such as coconut milk, and another to soup, beans, or vegetables. Keeping each type in its own lane makes replenishment much simpler.
How to make the system work
- Measure first. Check the cabinet's internal width, depth, and height, including any hinges or plumbing that might interfere.
- Match the can size. Confirm that the dispenser accommodates your usual can diameters and heights.
- Load thoughtfully. Place older cans toward the front or in the first-to-use position, following the organizer's intended dispensing direction.
Some dispensers are designed to roll cans forward automatically, while others simply separate rows. Choose a style that suits your storage depth and comfort level. A clear labeling system on each lane helps everyone in the household return cans to the right place.
Clear Bins for a Streamlined Pantry Shelf
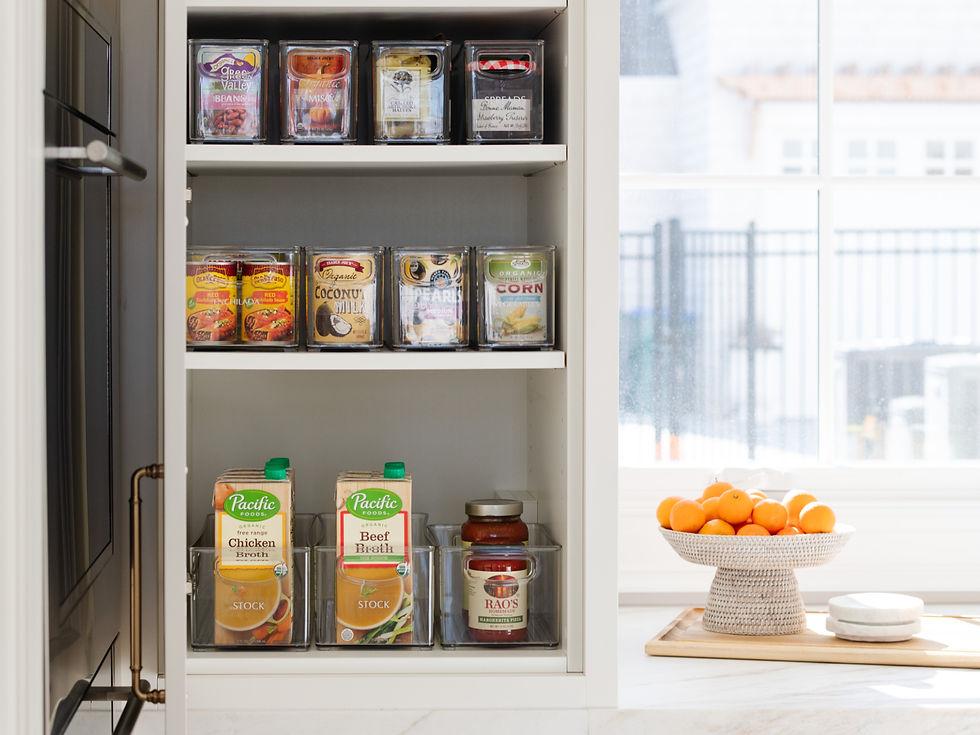
Contain the clutter without hiding the contents. Clear bins offer a flexible alternative to fixed can racks, particularly on open shelves or inside a cabinet with several different food categories. They create boundaries around each group while keeping labels visible, making the pantry easier to scan during meal planning.
I would use individual bins for categories that tend to become mixed together: beans, fruit, vegetables, soups, and specialty ingredients. Low-sided containers are generally easier to access than tall boxes, while sturdy handles can help when a bin needs to be pulled forward. Choose containers wide enough for your cans to sit upright without squeezing them together.
A simple styling trick
Give every bin one clear purpose and add a short front-facing label. The contents can change with the seasons without the whole pantry needing to be reorganized.
Before purchasing containers, measure the shelf depth and width, and leave room to remove each bin comfortably. Avoid overfilling them: cans should be easy to lift out without tipping the entire group. Unlike a dispenser, a bin does not automatically rotate stock, so bring older cans forward whenever you replenish it.
Wooden Tiered Risers for a Warm, Built-In Look
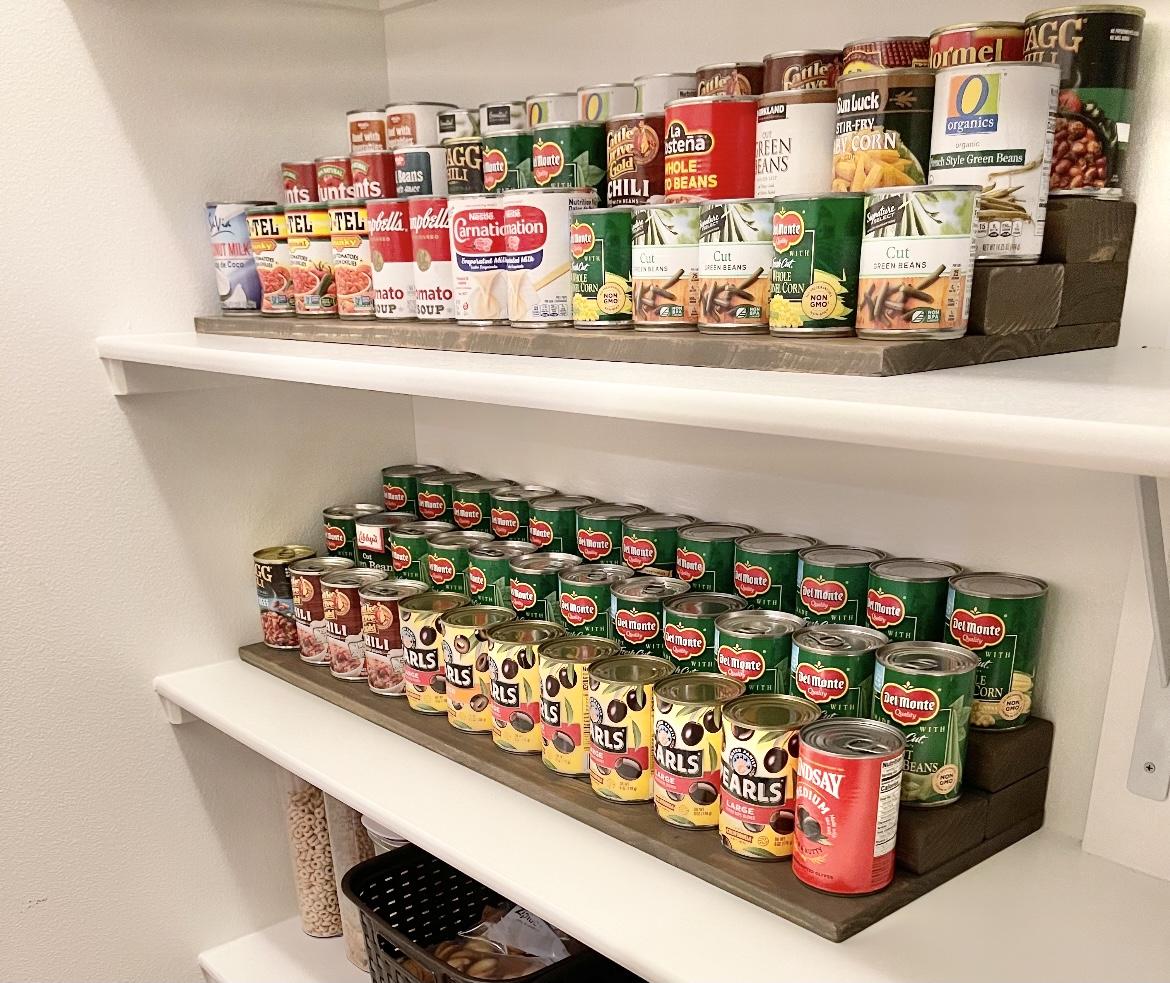
Bring a little furniture-like character to pantry storage. Wooden tiered risers provide the same visibility benefits as conventional shelf steps but introduce a warmer, more substantial look. Their raised rows make it easier to read labels across a collection of canned vegetables, beans, soups, and fruit without stacking tins precariously on top of one another.
This style is particularly attractive on long pantry shelves where rows of cans might otherwise feel visually flat. A natural wood finish pairs beautifully with white shelving, woven baskets, and simple storage jars. Darker finishes can also echo the look of a traditional pantry with more contrast.
- For a small shelf: Choose a compact riser that leaves room to reach the front row.
- For bulk storage: Use a wider unit with enough depth for the can sizes you buy most often.
- For a cohesive finish: Repeat the same wood tone on a nearby tray or basket rather than matching every accessory.
Check the weight rating and shelf dimensions before loading a wooden organizer. Keep heavier cans on the lower level, and avoid placing risers where they make frequently used ingredients difficult to reach. The result is practical storage that feels considered rather than purely utilitarian.
A Rolling Can Rack for Under-Counter Storage
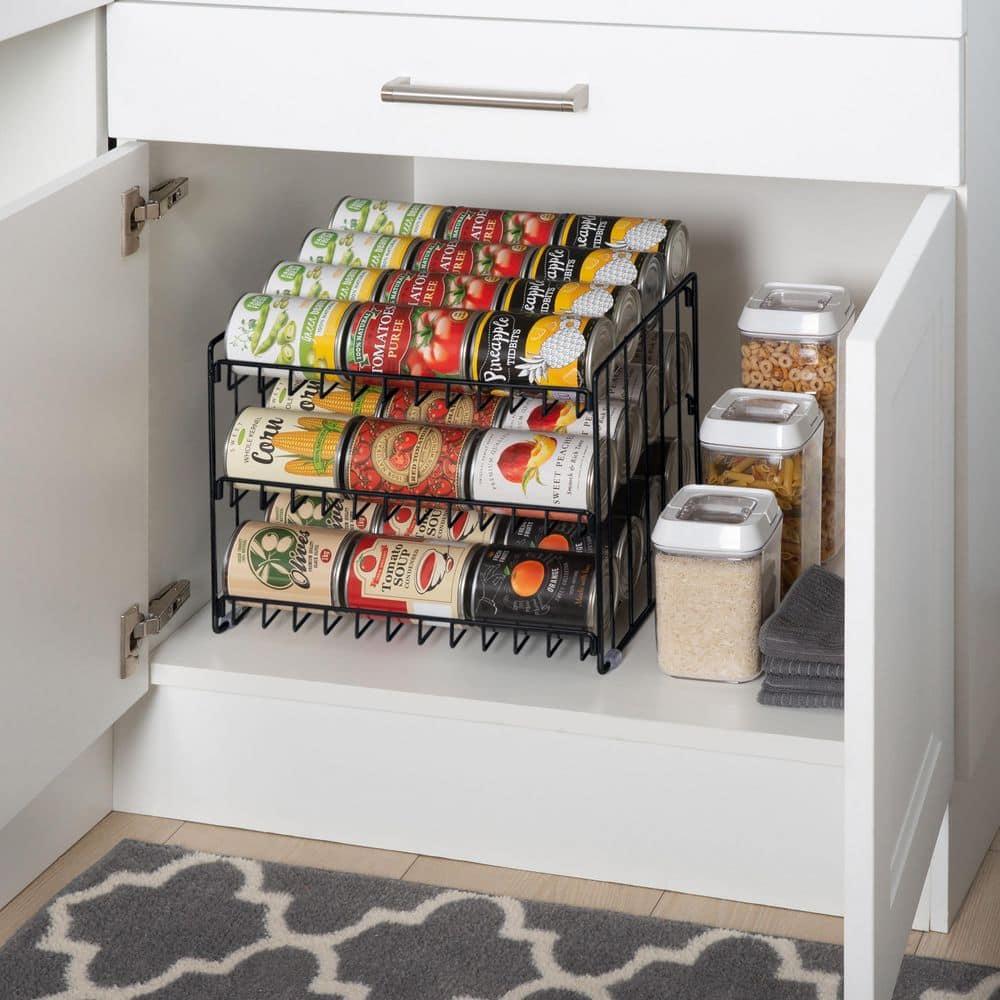
Make an awkward lower cabinet earn its keep. A freestanding rolling can rack can transform a deep base cabinet into an orderly reserve of pantry staples. Its tiered design stores cans horizontally in dedicated tracks, allowing you to see several varieties at once without building unstable towers.
This is a smart choice for anyone who prefers to keep bulkier supplies out of sight. Position the rack inside a cabinet with enough clearance to remove it for cleaning or restocking. Some models have wheels, while others are stationary, so check the product design rather than assuming every rack rolls.
Plan the cabinet around the rack
- Measure the opening: Account for the door, hinges, interior obstructions, and any lip at the cabinet base.
- Sort by category: Give each track a consistent purpose, such as tomatoes, soups, beans, or fruit.
- Keep a reserve list: Record extra cans that are stored behind the everyday supplies.
The most useful arrangement is not necessarily the one that holds the greatest number of cans. It is the one that lets you remove and replace them easily. Leave enough space to handle cans safely, and avoid exceeding the rack's stated weight limit. If the cabinet is especially deep, consider a removable organizer that can be pulled into the room for restocking.
Over-the-Door Wire Racks for Vertical Storage
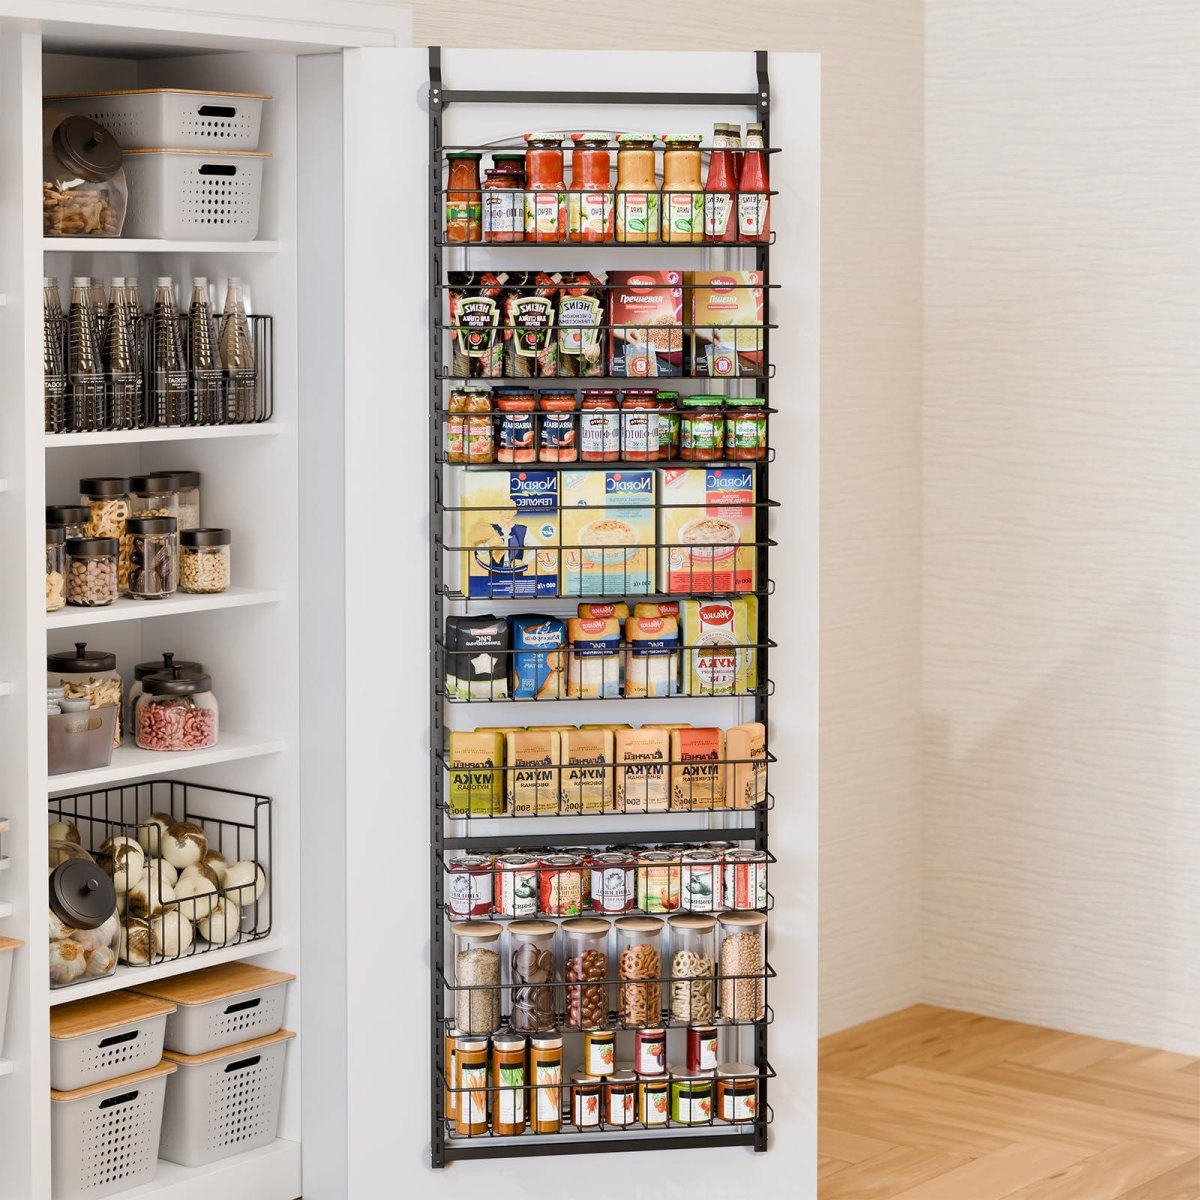
Use the back of the pantry door as valuable storage space. An over-the-door rack takes advantage of an area that often goes unused, making it a useful option when shelf space is already crowded. Multiple wire baskets can separate sauces, small cans, tins, and other pantry items into easy-to-see groups.
The key is choosing a rack designed for the door and the weight of its contents. A narrow organizer can work well in a compact pantry, while a full-height system offers more capacity for households with extensive supplies. Adjustable basket heights are particularly helpful when mixing short tins with taller cans or jars.
Check before installing
Confirm the door can close with the rack attached, that the mounting system suits the door type, and that the total load stays within the manufacturer's limits. Heavy cans can make an unsuitable door-mounted rack difficult to operate.
For the neatest arrangement, reserve upper baskets for lighter items and keep heavier cans lower, within comfortable reach. Label the baskets by category, and avoid packing them so tightly that products become difficult to remove. If the door swings frequently, test the organizer with a modest load first to make sure it remains stable during everyday use.
Dedicated Can Shelves for a Well-Stocked Pantry
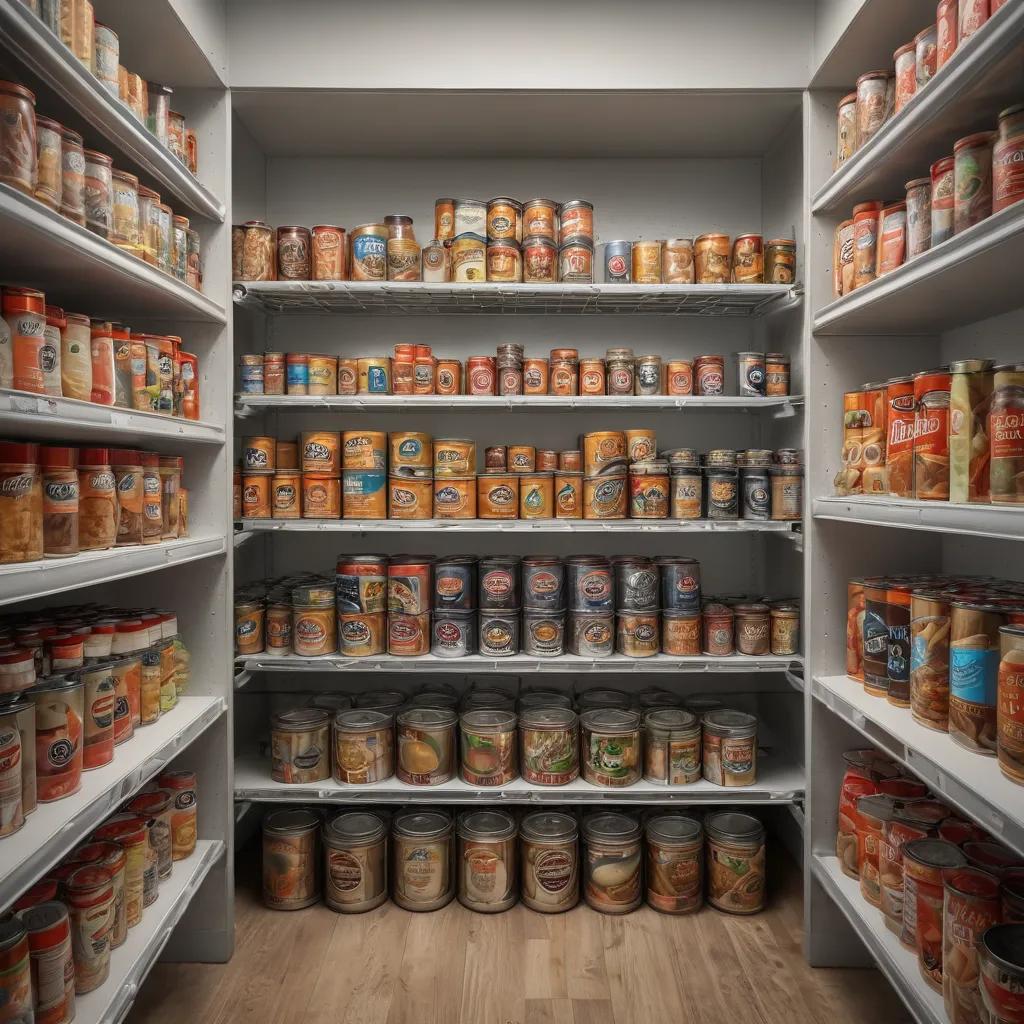
Give a large collection a clear home. When a pantry contains many canned goods, dedicated shelves provide the simplest framework for maintaining order. Rather than scattering cans wherever space happens to be available, assign each shelf a purpose and arrange products in visible rows.
A substantial collection can include everything from soup and coconut milk to beans, vegetables, fruit, and specialty ingredients. Grouping similar products together makes it easier to plan meals, spot duplicates, and identify gaps before the next grocery trip. It also creates a natural place for bulk purchases without allowing them to spread into unrelated categories.
- Everyday shelf: Keep the cans you use most frequently at a comfortable height.
- Reserve shelf: Store additional unopened cans behind or beside the current working stock, where they remain visible.
- Occasional-use shelf: Place specialty ingredients and less frequently used items in a clearly defined area.
Long shelves benefit from simple dividers or shallow bins that stop categories from drifting into one another. Avoid stacking cans too high, especially where labels become hidden or reaching the back row is awkward. Leave a little open space for new purchases and resist the urge to fill every inch. A pantry that can absorb a grocery delivery is much easier to maintain than one organized to its absolute limit.
Tiered Wooden Can Stands for Clear Label Visibility
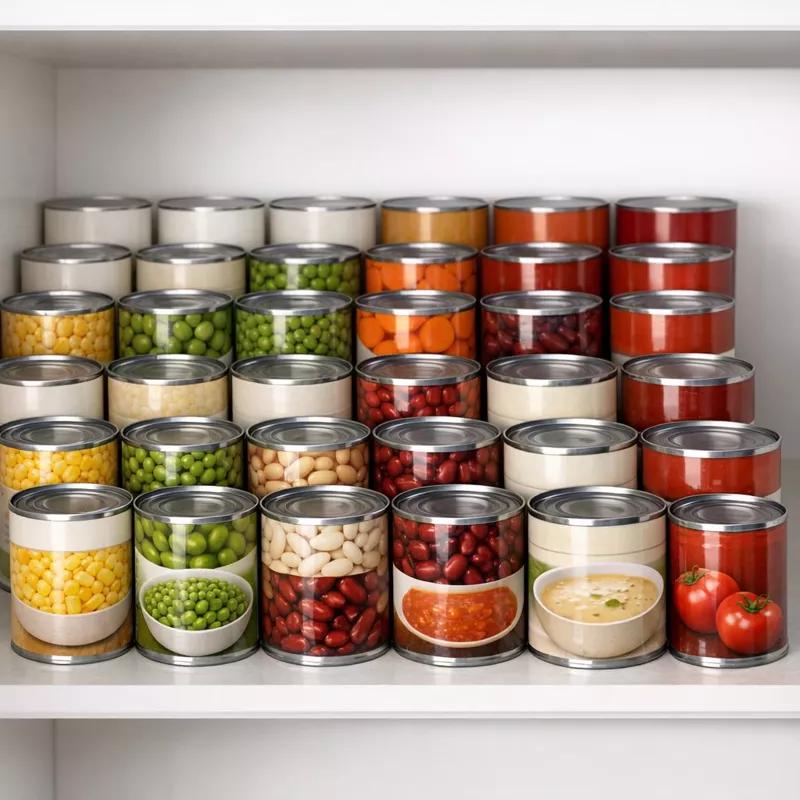
Let the labels do the organizing. Tiered wooden stands are especially effective when a pantry holds repeated purchases of the same canned vegetables or beans. By lifting the rear rows, the stands make it easier to distinguish varieties and sizes without moving several cans out of the way.
The design suits a dedicated pantry shelf where quantity and visibility matter more than hiding every package inside a container. It can also be helpful for households that buy multipacks, because several matching cans can be arranged together while remaining individually accessible.
For a consistent result, group cans by ingredient first and brand second. If you regularly cook with tomatoes, keep whole tomatoes, diced tomatoes, and tomato paste in neighboring but distinct groups. This makes substitutions easier to spot and reduces the chance of purchasing another can you already have plenty of.
My rule for pantry storage is simple: if I cannot identify an ingredient without moving three other things, the system needs adjusting.
A practical pantry principle
Choose stands that fit the shelf and support the combined weight of your cans. Keep taller tins toward the rear only when their labels remain readable, and leave enough space to lift products out without catching neighboring cans. Wooden stands can be paired with clear bins elsewhere, creating a consistent organizing system without requiring every storage accessory to match.
Date Labels and First-In, First-Out Can Storage
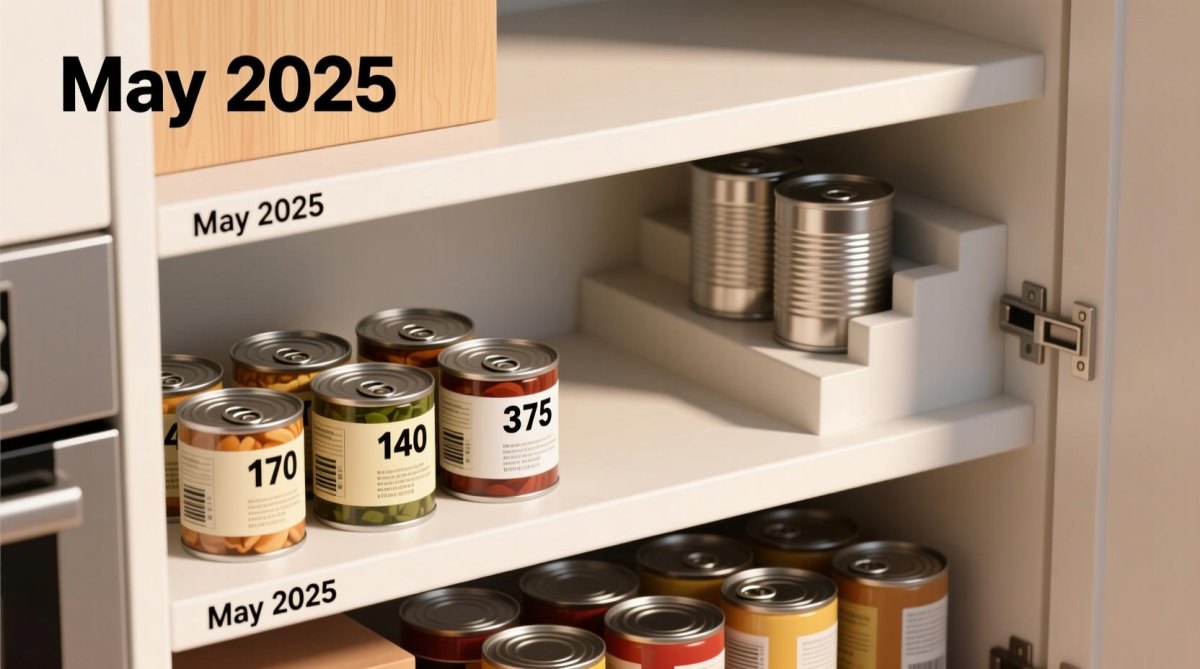
Make rotation part of the organization, not an afterthought. A tidy pantry is useful only when its contents are easy to monitor. Date labels and a simple first-in, first-out routine help prevent older cans from becoming forgotten at the back of a shelf. This method works especially well for households that purchase staples in bulk or keep several cans of the same ingredient.
When new groceries arrive, check the dates on the existing stock before putting the new cans away. Move the older, suitable cans to the front and place newer purchases behind them. Follow the package's date and storage guidance, and inspect cans before use; discard cans that are leaking, bulging, badly rusted, or deeply dented, particularly around seams.
- Check. Review existing cans and identify those that should be used sooner according to their labels and condition.
- Rotate. Bring older stock forward and place new purchases behind it.
- Record. Add a date or category note when it helps track a large reserve, without covering essential product information.
Not every can needs an elaborate label. A small inventory sheet or a removable shelf label may be enough. Remember that date markings can have different meanings depending on the product and local rules, so follow the manufacturer's guidance rather than treating every date as identical.
Clear Shelf Bins for a Family-Friendly Pantry
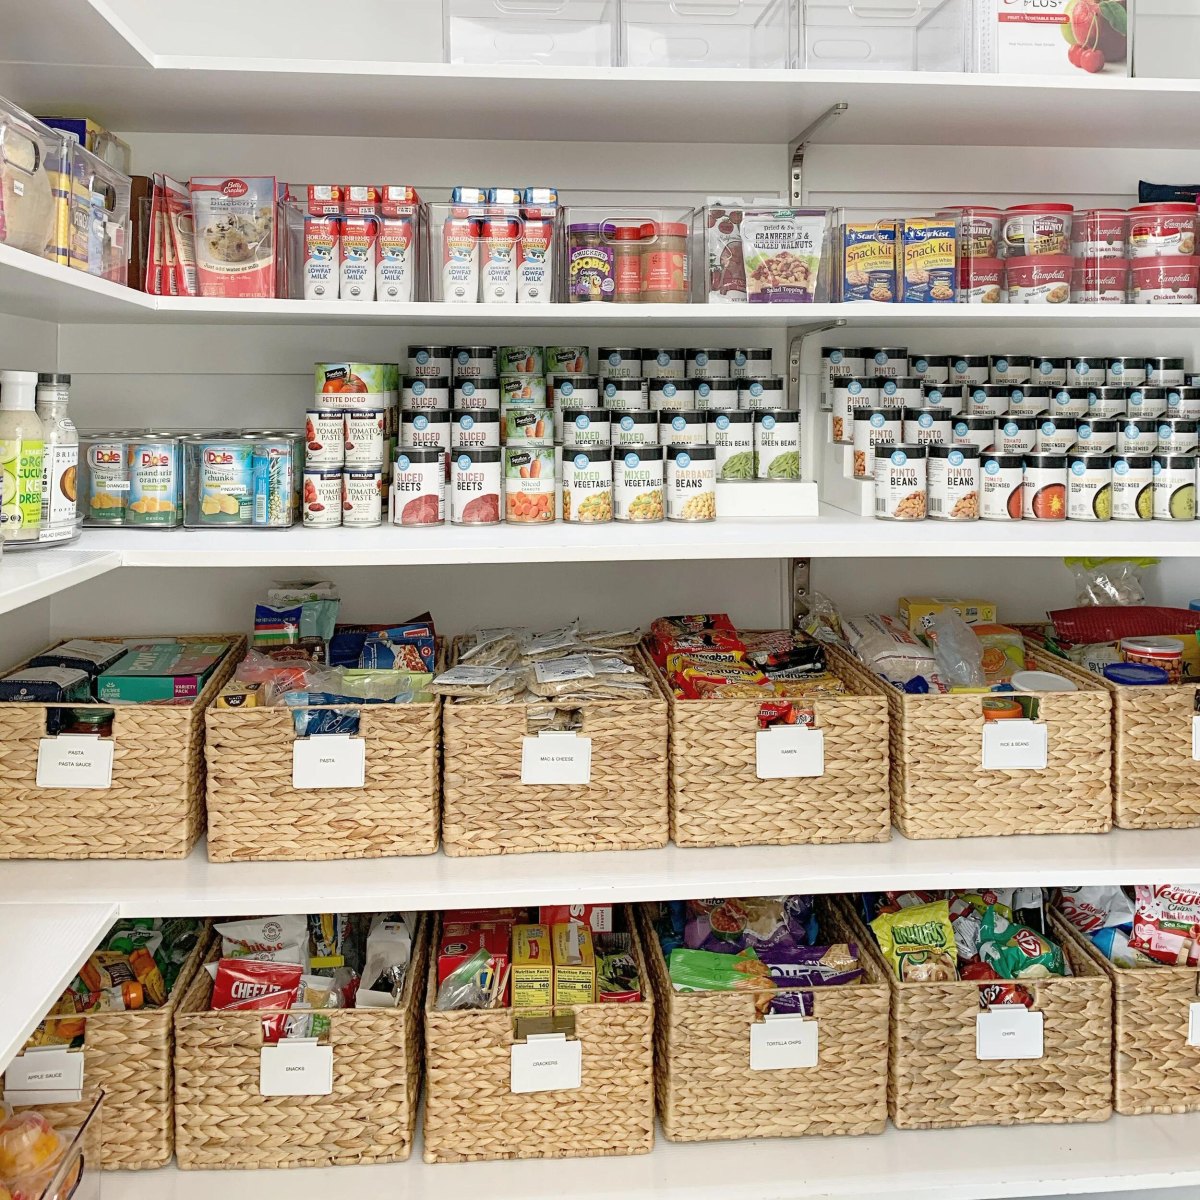
Build a system that everyone can put back correctly. A family pantry often holds far more than cans, so combining clearly grouped canned goods with labeled baskets for pasta, snacks, baking supplies, and meal kits can make the whole space easier to use. The important detail is that every category has a defined home.
Use the main shelves for cans arranged by type, with clear bins or small dividers separating beans, vegetables, fruit, and soups. Lower baskets can hold flexible food categories that are awkward to stack, while upper shelves can accommodate lightweight extras. Simple, readable labels make it easier for children and adults alike to find things and put them away without reorganizing the pantry every week.
A family-friendly pantry checklist
- Keep everyday ingredients within comfortable reach.
- Use short labels that describe the contents clearly.
- Leave room in bins for easy removal and return.
- Store heavy cans on stable shelves rather than high baskets.
- Review duplicates before the next grocery shop.
There is no need to decant canned food into other containers; the original sealed can is already its storage package. Keep the cans intact and use bins only to organize them. For a cohesive look, repeat a small set of basket styles and label formats, but prioritize durability and access over matching every container. The best family system is the one that stays understandable even when the pantry is busy.
Lazy Susan Storage for Awkward Corner Cabinets
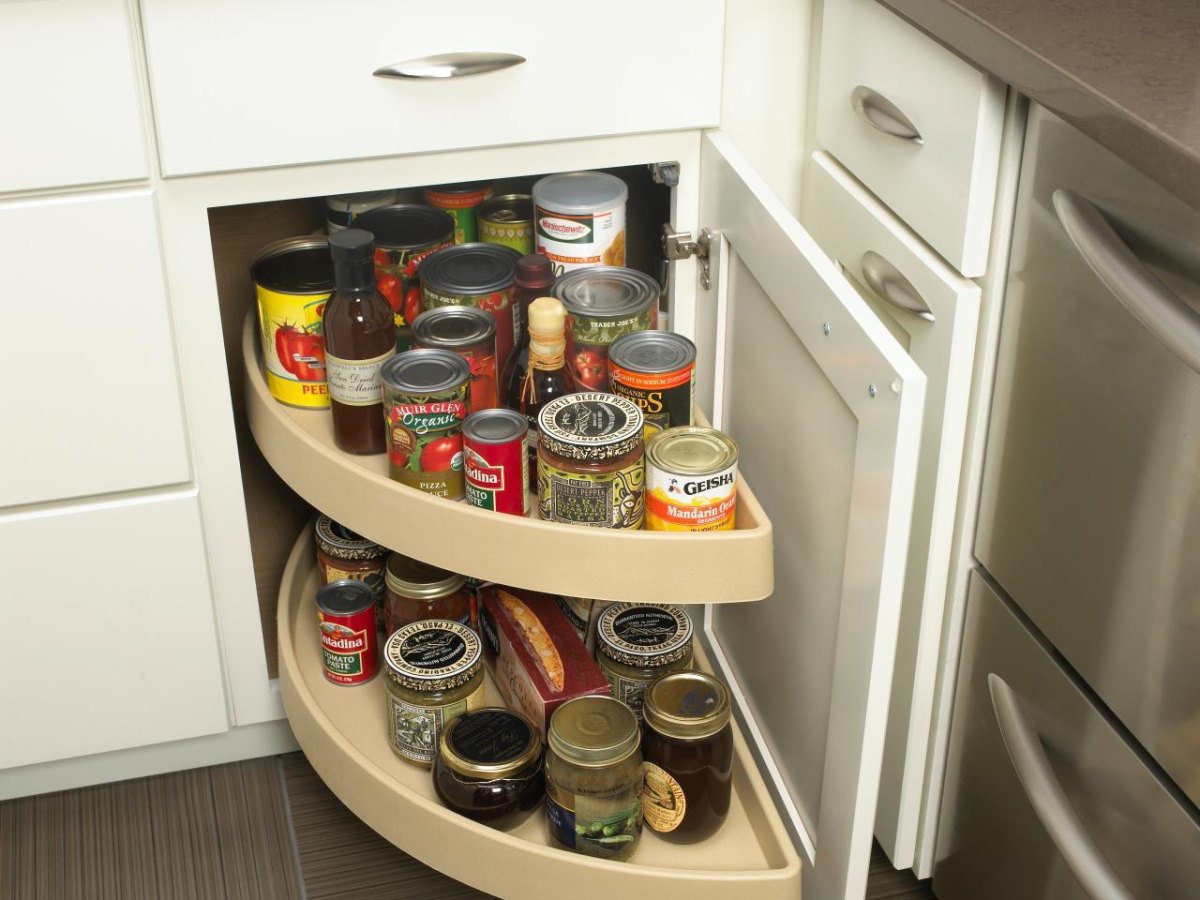
Bring the hidden corner back into circulation. Corner cabinets can be notoriously difficult to organize because products at the back are easy to overlook. A rotating lazy Susan makes better use of that awkward space by allowing cans to move into view instead of requiring you to reach blindly behind them.
This arrangement works particularly well for smaller cans, jars, tomato paste, specialty vegetables, and other items that tend to get lost in deep cupboards. A turntable with a raised edge helps keep products contained as it rotates, while a two-level design can increase capacity if the cabinet has enough vertical clearance.
- Measure the usable area: Check the cabinet's width, depth, and height, including the door opening and any fixed shelf supports.
- Keep categories separate: Use one section for sauces and pastes, another for small cans, and another for jars where space allows.
- Balance the load: Distribute heavier products evenly and avoid overcrowding the rotating surface.
For a stable setup, choose a turntable that sits flat and rotates smoothly under the expected weight. Check that cans cannot fall off the edge when the organizer turns. This solution is especially helpful in a cabinet that would otherwise require constant unloading just to reach one ingredient, although it may be less efficient than a fixed rack for a large collection of identical cans.
A Corner Pantry With Inventory Lists and Defined Zones
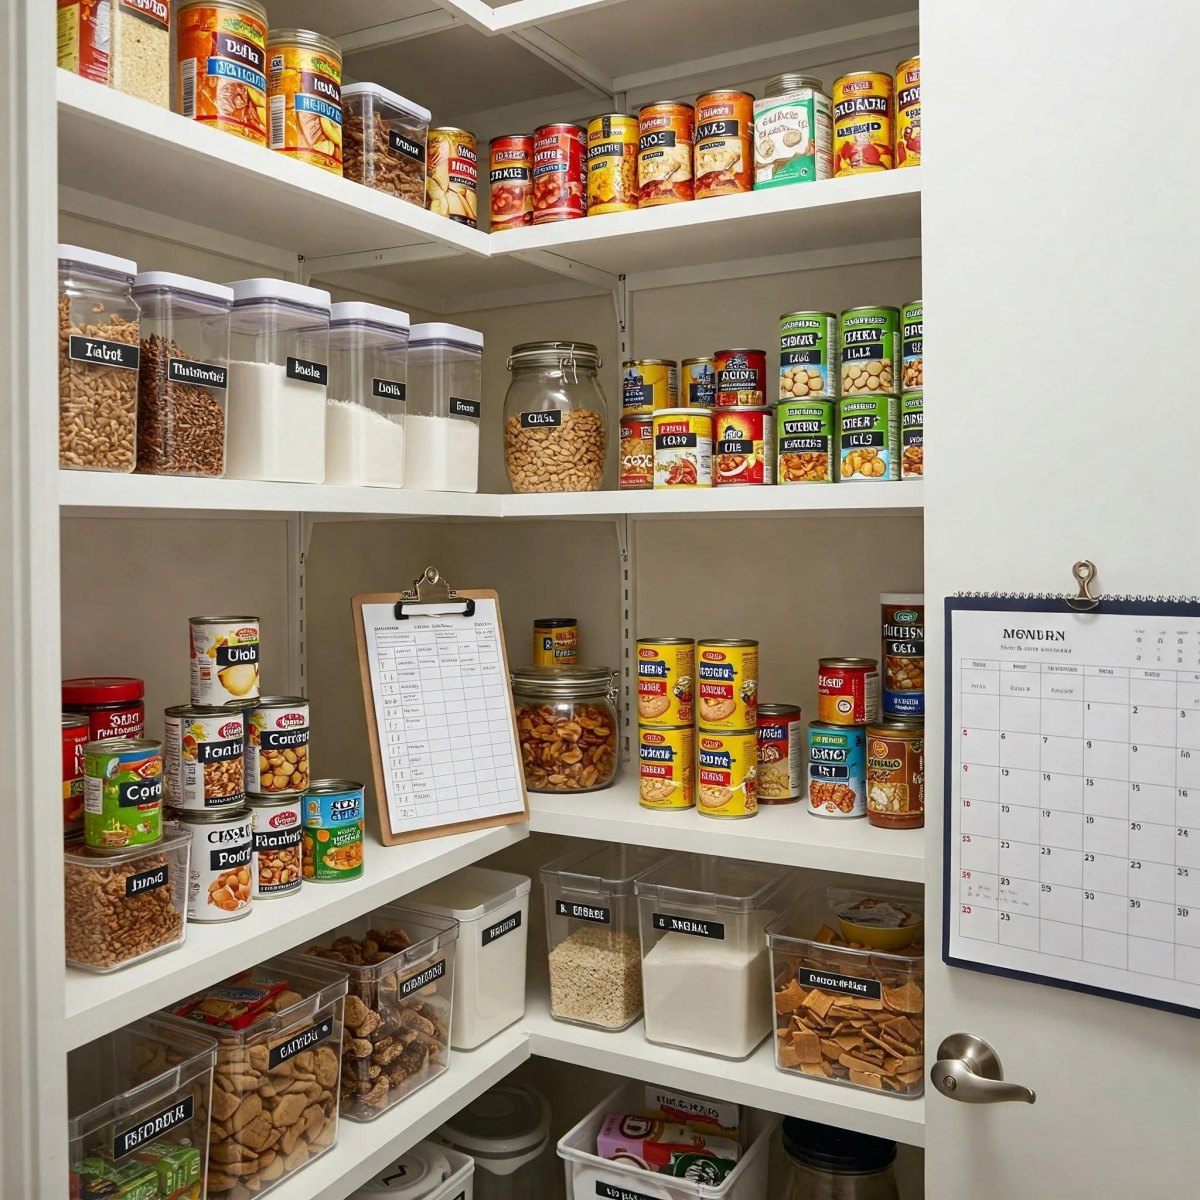
Organize the whole pantry around the way you cook. In a larger corner pantry, the most effective approach is often a combination of open shelves, clear containers, baskets, and a simple inventory system. Canned goods can occupy accessible middle shelves, while dry staples and snacks live in their own clearly separated zones.
Arrange cans in compact groups by ingredient, keeping labels facing outward and similar products together. Reserve a predictable place for backup stock so that extra cans do not become scattered across multiple shelves. A clipboard or small inventory list can track frequently purchased staples, making it easier to see what is running low before shopping.
Start with three zones:
- Daily cooking: Tomatoes, beans, broth, and other ingredients used regularly.
- Meal planning: Canned items for specific recipes, including coconut milk, vegetables, fruit, or soups.
- Backup supplies: Additional cans and less frequently used ingredients, stored together and rotated into everyday stock.
Corner shelving offers plenty of capacity, but deep corners can still conceal forgotten products. Use bins or turntables selectively where access is difficult, rather than buying an organizer for every shelf. Keep heavy cans at a safe height and avoid overloading any shelf. A brief weekly glance at the inventory, combined with rotating older stock forward, will usually do more for long-term order than a complicated tracking system.
An organized canned-goods pantry does not need expensive equipment or perfectly matching containers. Start with the problem that bothers you most: cans hidden behind one another, wasted corner space, or a cupboard that is difficult to restock. Add one suitable organizer, establish a simple category system, and rotate older cans forward as you shop. A few thoughtful changes can make everyday cooking smoother while helping you use the ingredients you already own.
Frequently Asked Questions
What is the best way to organize canned goods in a small pantry?
Start with tiered shelf risers to make labels visible without taking up much additional space. Use clear bins for small categories and keep frequently used cans at the front. If the cupboard is deep, a compact pull-out dispenser may make better use of its depth.
Should canned goods be stored in a dispenser or on a shelf?
Both can work well. Dispensers are useful for regularly used cans of similar sizes, while ordinary shelves and risers are more flexible for different can shapes and occasional-use ingredients. Choose the option that makes your stock easy to see, reach, and rotate.
How do I prevent canned food from getting lost at the back of the pantry?
Group cans by category, keep labels facing outward, and use risers or pull-out organizers where appropriate. When restocking, move older cans forward and place newer purchases behind them. A simple inventory list can also help track bulk purchases and avoid unnecessary duplicates.
Are clear plastic bins good for canned food storage?
Yes. Clear bins can separate categories and make pantry contents easy to identify. Choose sturdy containers that fit your shelf dimensions, leave room to lift cans out comfortably, and avoid overloading them. Keep canned food in its original sealed packaging rather than transferring the contents into storage bins.

 Home Design18 Midlife Home Makeover Ideas for a More Comfortable, Stylish Home
 Home Organization15 Bathroom Drawer Organization Ideas to Maximize Space and Reduce Clutter
 Celebrity Fashion10 Standout Oscars Red Carpet Dresses That Inspire Timeless Style
 Celebrity FitnessCelebrity Fitness Transformations Worth Looking At