A walk-in pantry works best when storage follows how you actually use the space, rather than simply filling every shelf. Current organizing guidance consistently favors adjustable shelving, dedicated zones, clear containers, pull-outs, and labels because these systems make food easier to see and retrieve.
I would start with the structure before buying containers. Measure shelf depth, group similar foods, and keep frequently used items within comfortable reach. The goal is simple: everything should have a logical home, and that home should remain easy to reset after grocery shopping.
Use Adjustable Shelving for Flexible Storage
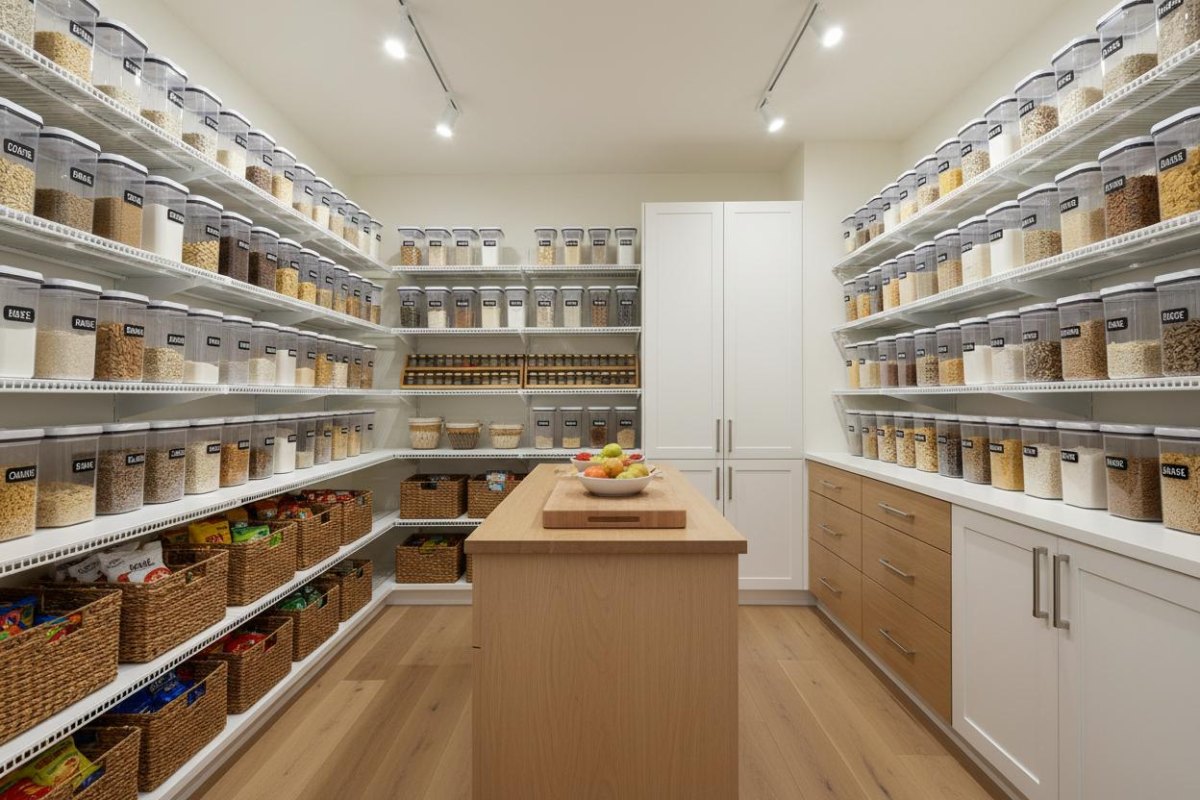
Adjustable shelves are one of the most useful foundations for a walk-in pantry because food containers rarely come in one convenient height. I like setting shelf spacing around the items being stored, leaving enough clearance for cereal boxes, jars, and taller bottles without creating unnecessary vertical gaps. Current pantry-design guidance also emphasizes adjustability as a way to accommodate changing storage needs.
Practical tip
Keep the shelves you reach for most often at comfortable eye-to-waist height, while reserving higher shelves for less frequently used supplies.Create a Dedicated Zone for Canned Goods
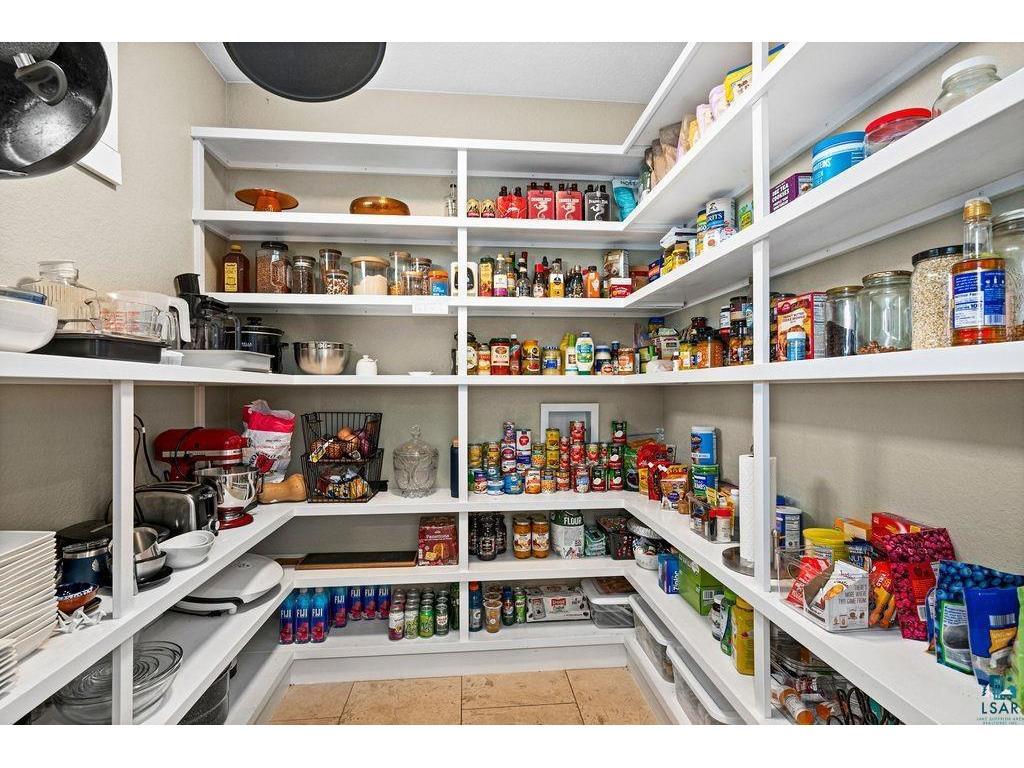
Canned goods become much easier to inventory when they occupy a dedicated pantry zone instead of being scattered across several shelves. Group vegetables, beans, tomatoes, soups, and other cans by type, then use stepped shelving or risers so containers behind the front row remain visible. Tiered storage is specifically recommended for improving visibility of canned goods.
| Zone | Useful placement |
|---|---|
| Everyday cans | Eye-level shelf |
| Backup cans | Lower or deeper shelf |
| Small specialty cans | Riser or shallow bin |
Add Pull-Out Bins for Deep Shelves
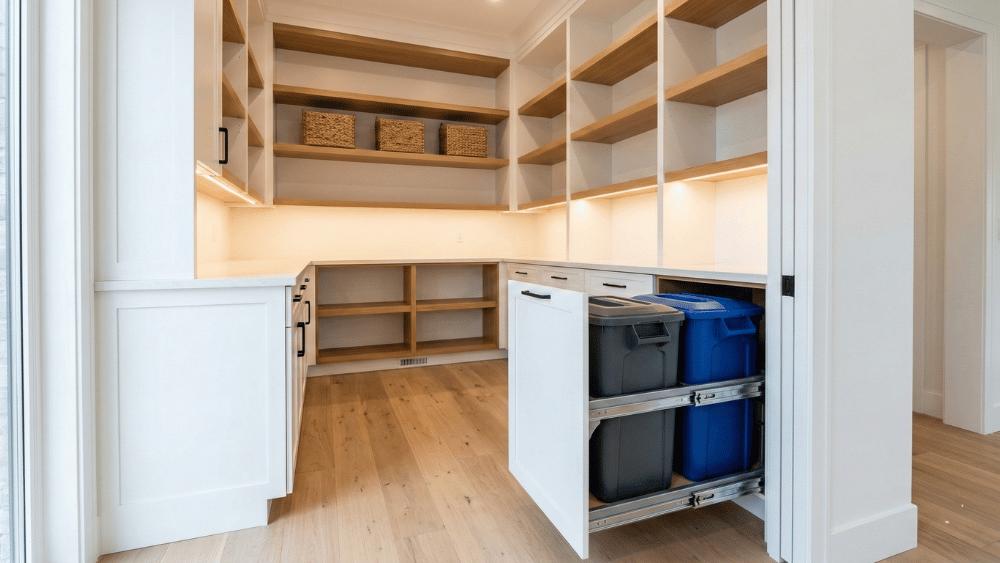
Deep shelves can create a visibility problem because items at the back disappear behind the front row. Pull-out bins solve that by turning the shelf into something closer to a drawer, allowing the entire category to move forward. Recent deep-pantry guidance repeatedly recommends pull-out storage for deep shelves, particularly where reaching the back would otherwise require unloading the front.
- Measure. Check shelf depth, opening width, and available height.
- Group. Give each bin one clear category, such as pasta or snacks.
- Pull forward. Position the bin so its contents can be reached without moving neighboring categories.
Store Dry Ingredients in Clear Containers
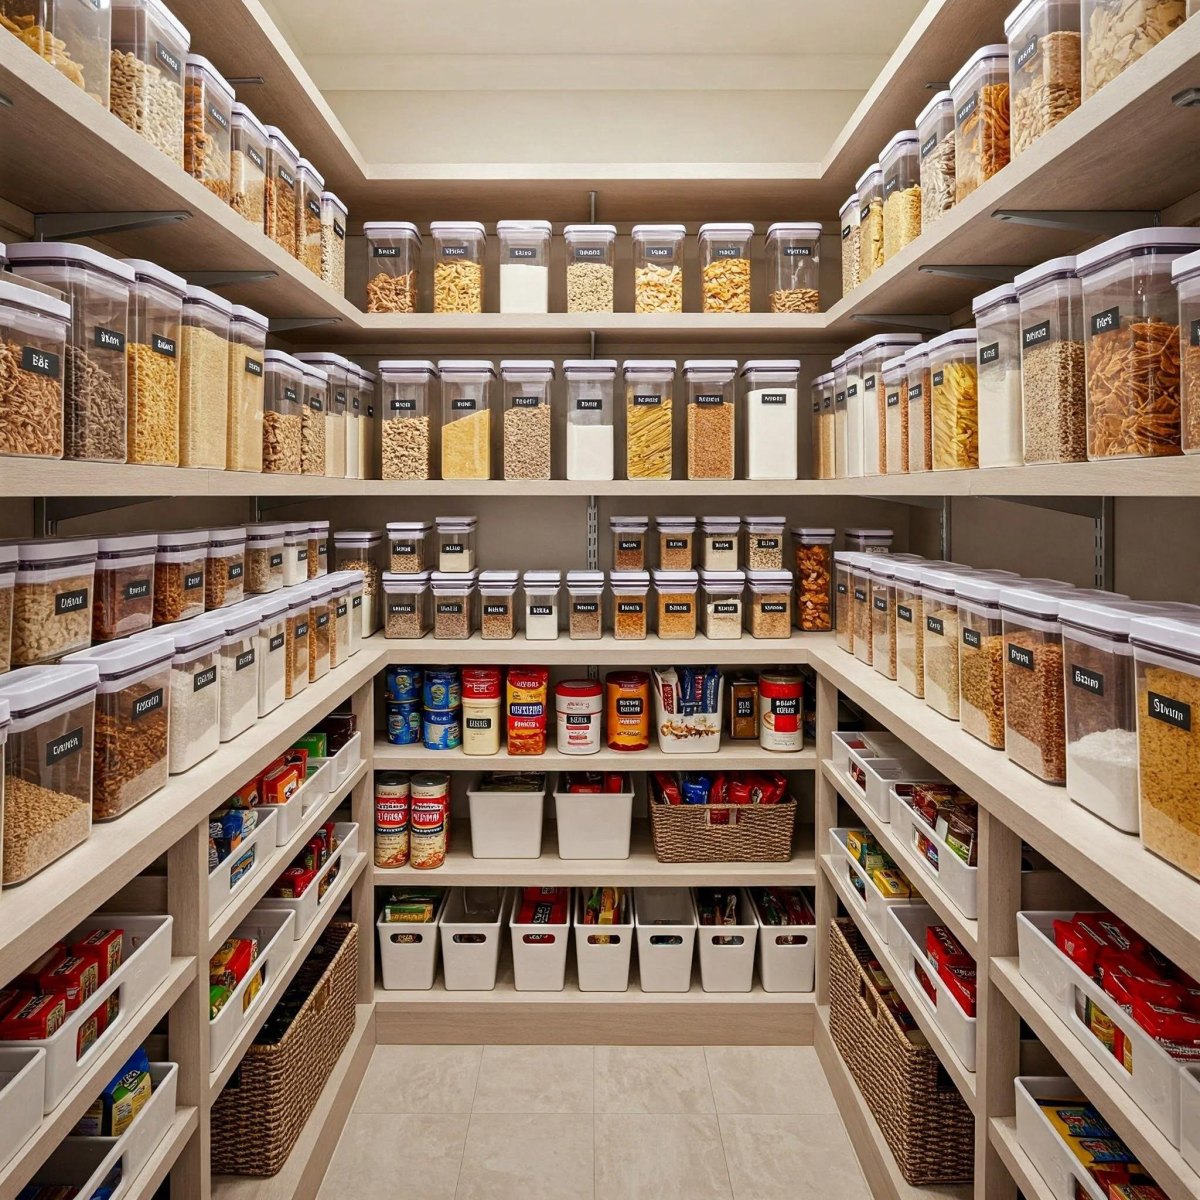
Clear, airtight containers can make staple ingredients easier to identify at a glance. Flour, rice, pasta, beans, grains, and similar dry goods are natural candidates for clear pantry containers, provided the container is appropriate for the food and the original product information is retained or transferred accurately. Martha Stewart's 2026 pantry guidance recommends airtight containers or jars for dry goods and clear labeling.
One detail not to skip
If you decant food from its original package, keep useful date information with the new container. A beautiful row of jars is less useful if you cannot tell what is inside or when it needs attention.Install a Spice Rack on the Pantry Door
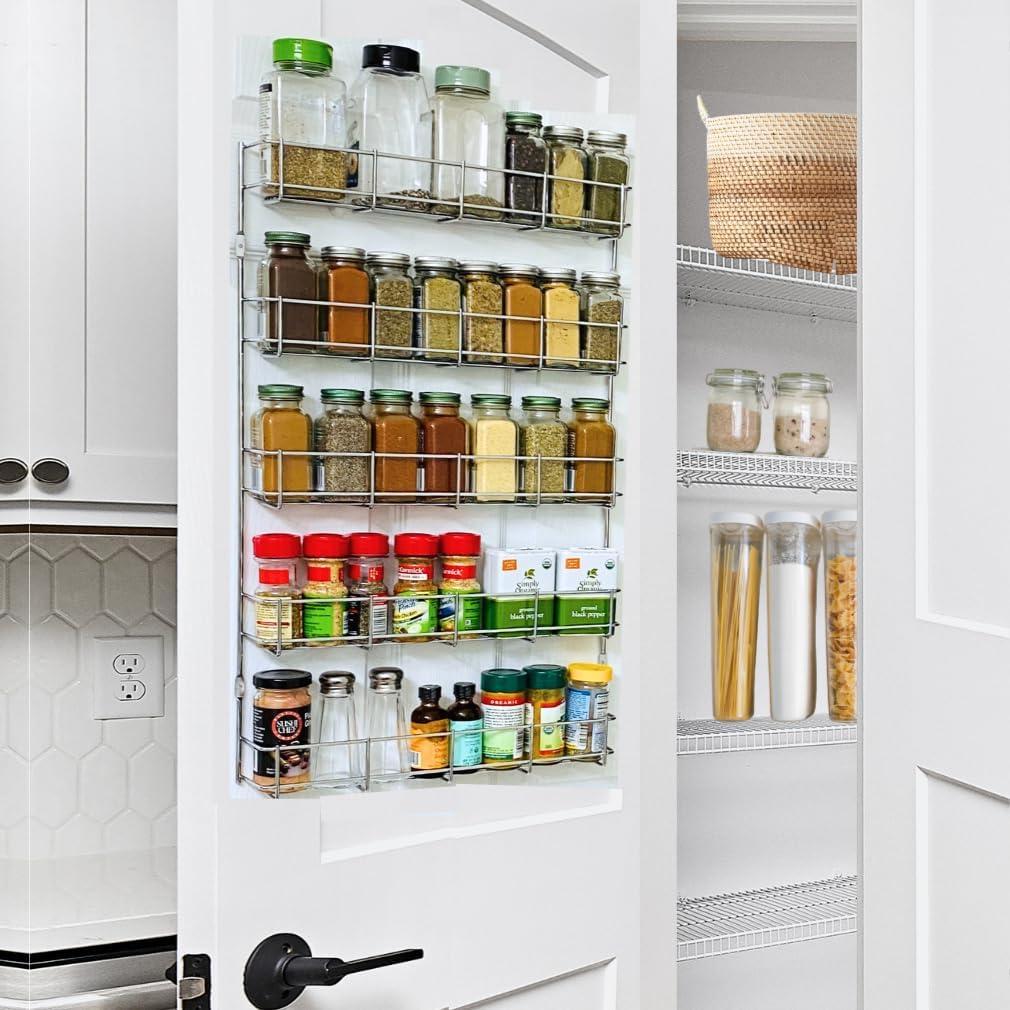
The back of the pantry door is valuable vertical space, especially for small containers. A door-mounted rack can keep spices upright and visible instead of allowing them to disappear behind larger pantry items. Good Housekeeping's 2026 organization guidance specifically recommends door-mounted spice storage as a way to use otherwise overlooked space.
- Everyday spices: Keep frequently used seasonings at comfortable hand height.
- Baking spices: Group cinnamon, nutmeg, cloves, and similar ingredients together.
- Rarely used blends: Place them higher if the rack allows.
Dedicate a Shelf to Baking Supplies
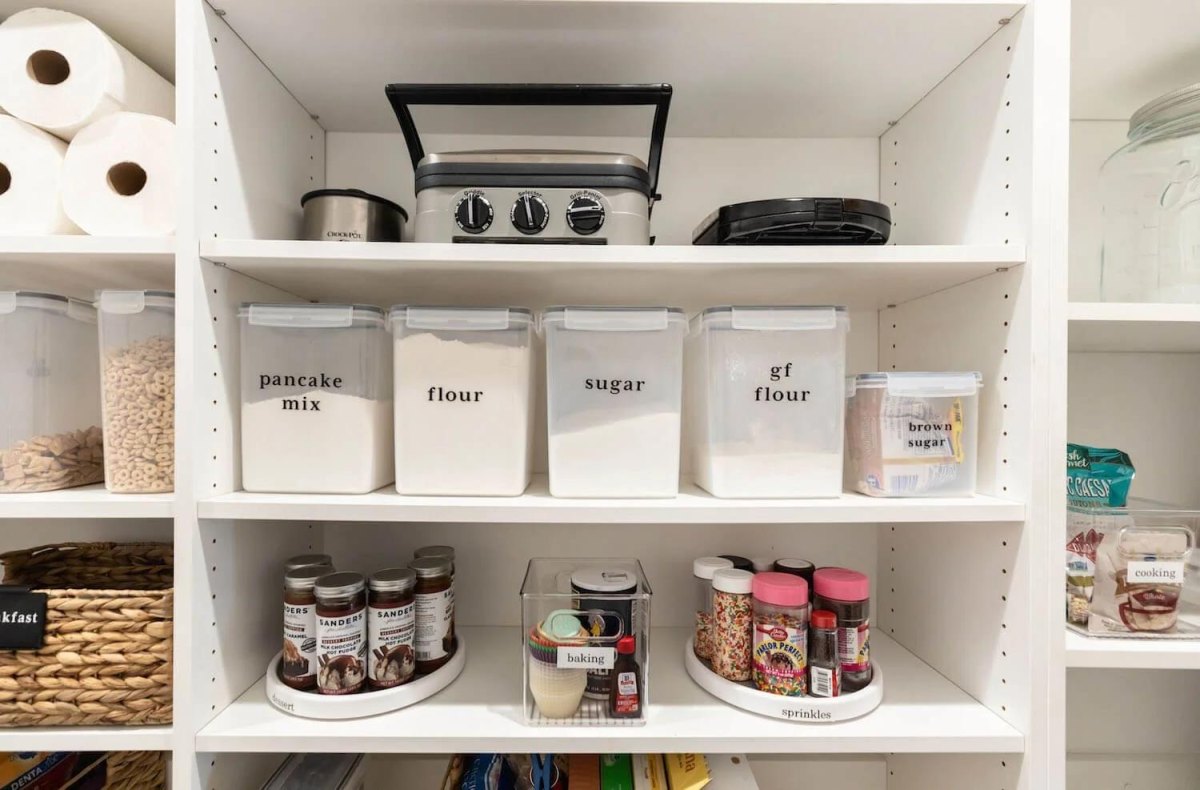
A dedicated baking shelf reduces the hunt for flour, sugar, baking powder, decorations, and specialty ingredients. I prefer keeping the most-used baking staples together, with smaller ingredients grouped nearby rather than spread throughout the pantry. Good Housekeeping recommends accessible middle-shelf storage for common baking ingredients, while Martha Stewart's 2026 guidance favors organizing pantry shelves into purpose-based stations.
Why it works
- Faster ingredient gathering
- Clearer inventory
- Easier grocery restocking
Watch for
- Overfilling one shelf
- Mixing opened packets with bulk ingredients
- Putting rarely used decorations in prime space
Use Lazy Susans for Oils, Sauces, and Condiments
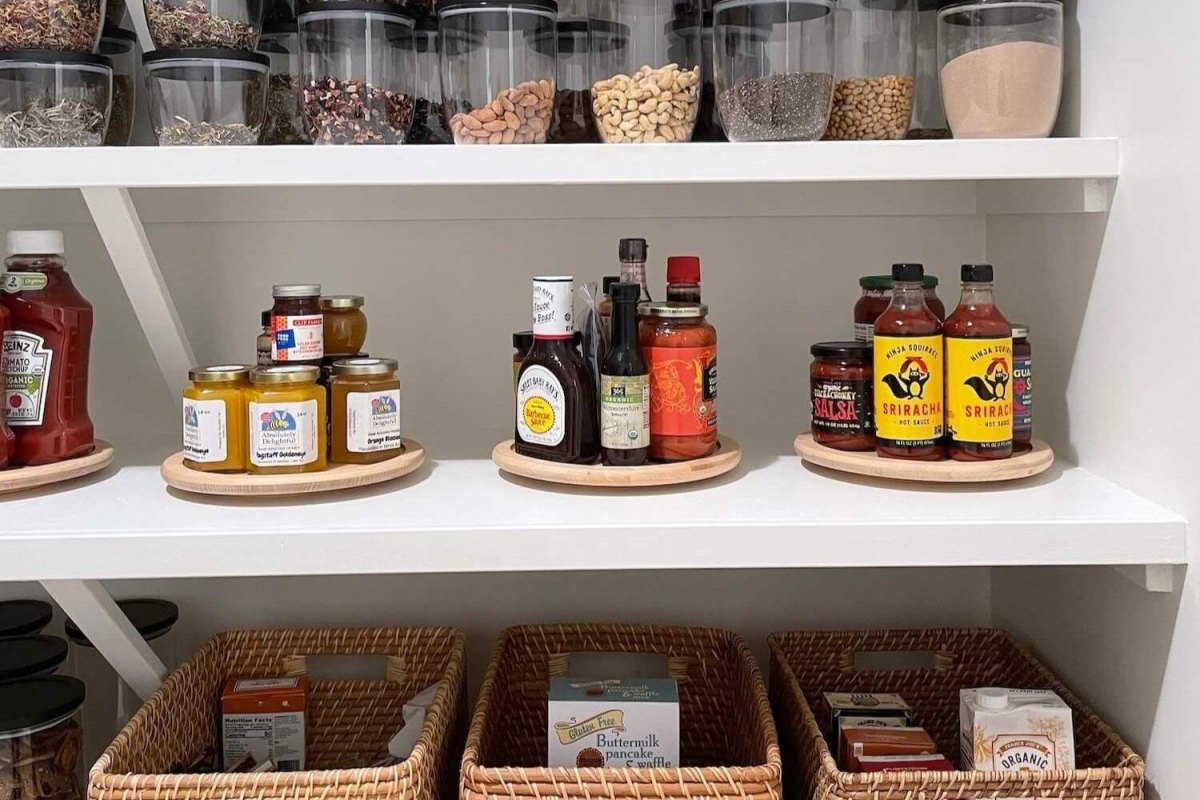
Lazy Susans are particularly useful where bottles would otherwise become a second row of unreachable items. Place oils, vinegars, sauces, syrups, or other similar bottles on a rotating organizer so turning the tray brings the back items forward. Pantry-organizing guidance commonly recommends turntables for deep shelves and corners, especially for bottles and condiments.
Best placement
Leave enough clearance around the turntable for bottles to rotate freely. For heavy bottles, choose a sturdy organizer with a raised edge and place it on a lower shelf.Add Vertical Dividers for Trays and Cutting Boards
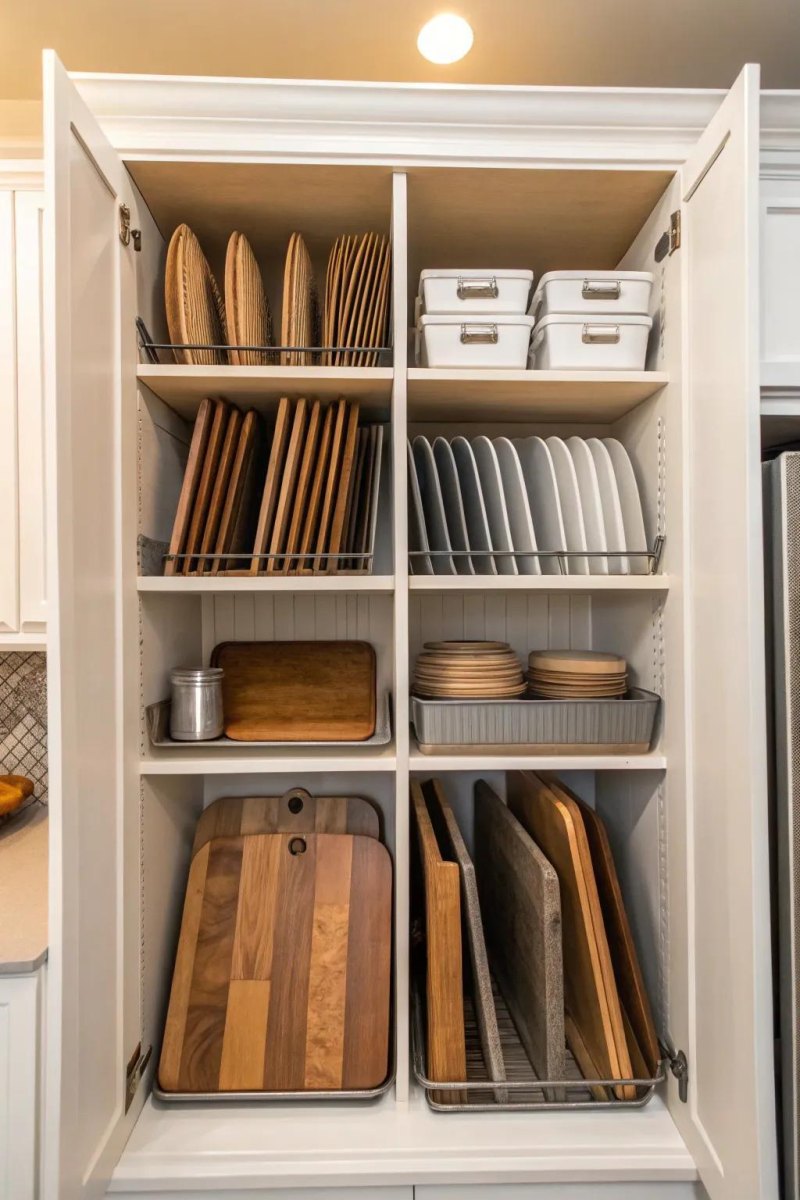
Flat items are awkward when stacked because the piece you need is often at the bottom. Vertical dividers turn a section of shelving into upright slots for trays, baking sheets, cutting boards, and similar flat pieces. Pantry storage systems commonly use this approach because it makes individual pieces easier to remove without disturbing the rest.
- Measure the tallest tray before installing dividers.
- Leave enough width for each item to slide out comfortably.
- Keep frequently used boards toward the front.
- Separate fragile pieces from heavy metal trays where practical.
Keep Snacks in Accessible Baskets
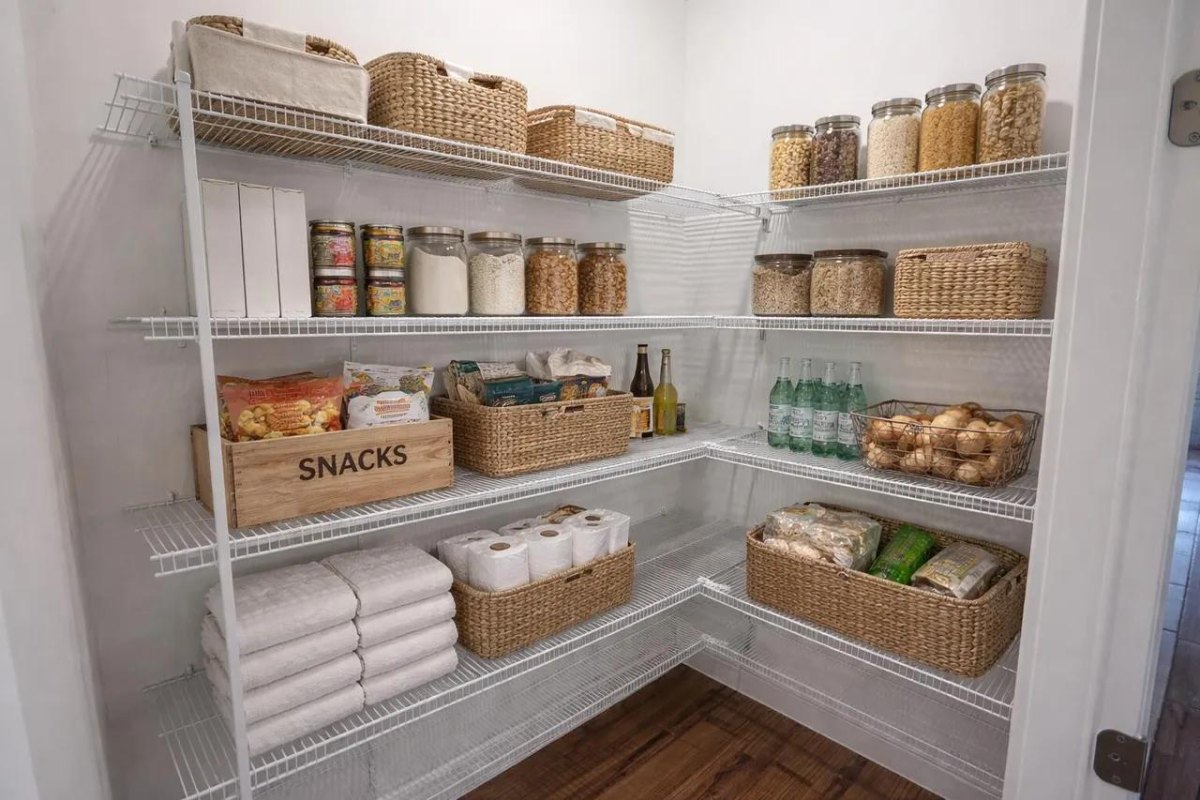
Snacks are a good category for open baskets because individual packets and bags can otherwise spread across a shelf. A structured basket creates one defined snack zone, while clear or open sides let you check the contents quickly. Martha Stewart's pantry guidance recommends designated baskets for snacks, and Good Housekeeping similarly highlights baskets for grouping pantry items.
Make the basket match the routine
For a household with children, put everyday snacks where they can be reached safely. Keep specialty or backup snacks elsewhere so the main basket does not become an oversized catch-all.
Make Use of the Pantry’s Corners
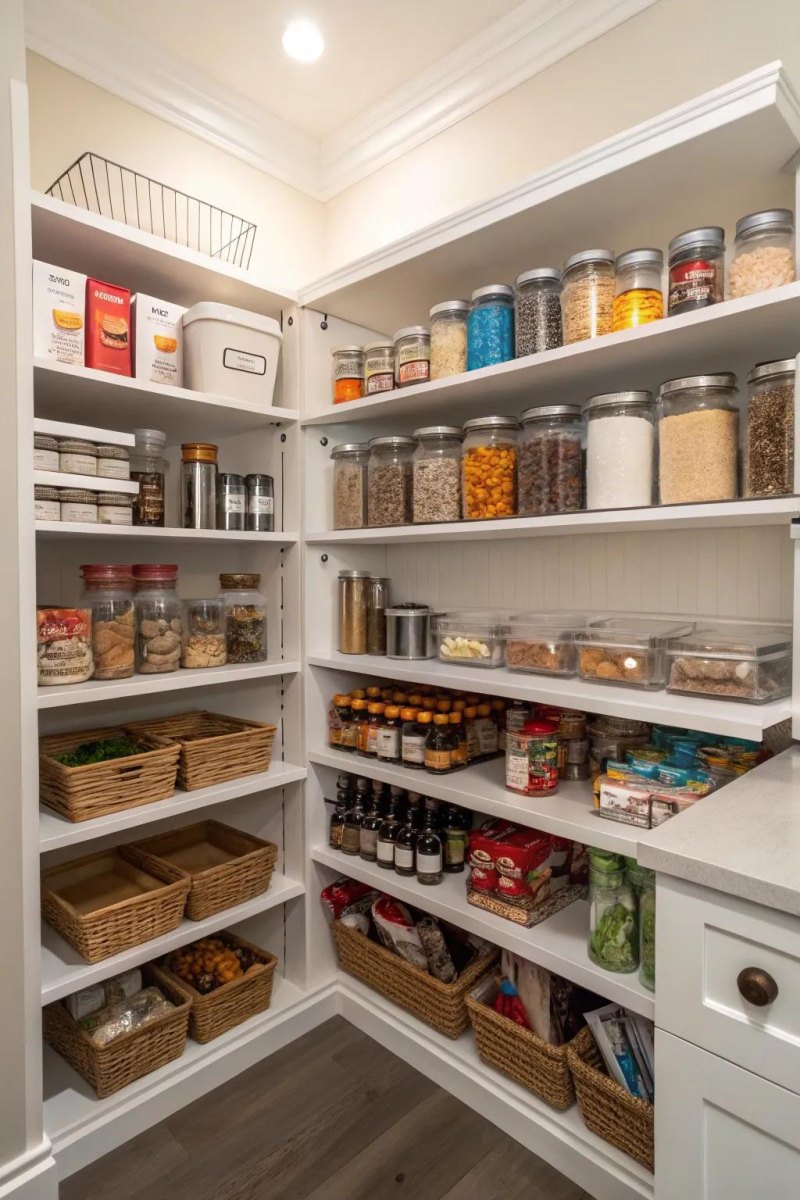
Pantry corners are easy to underuse because straight shelves can leave awkward areas that are difficult to reach. Corner shelves, rounded shelving, or rotating storage can turn those spaces into usable storage zones. Custom pantry systems increasingly account for irregular and L-shaped layouts rather than treating corners as dead space.
A common mistake
Do not fill a hard-to-reach corner simply because space exists. Store backup stock or less frequently used items there unless you have a reliable pull-out or rotating system.Label Containers and Storage Bins Clearly
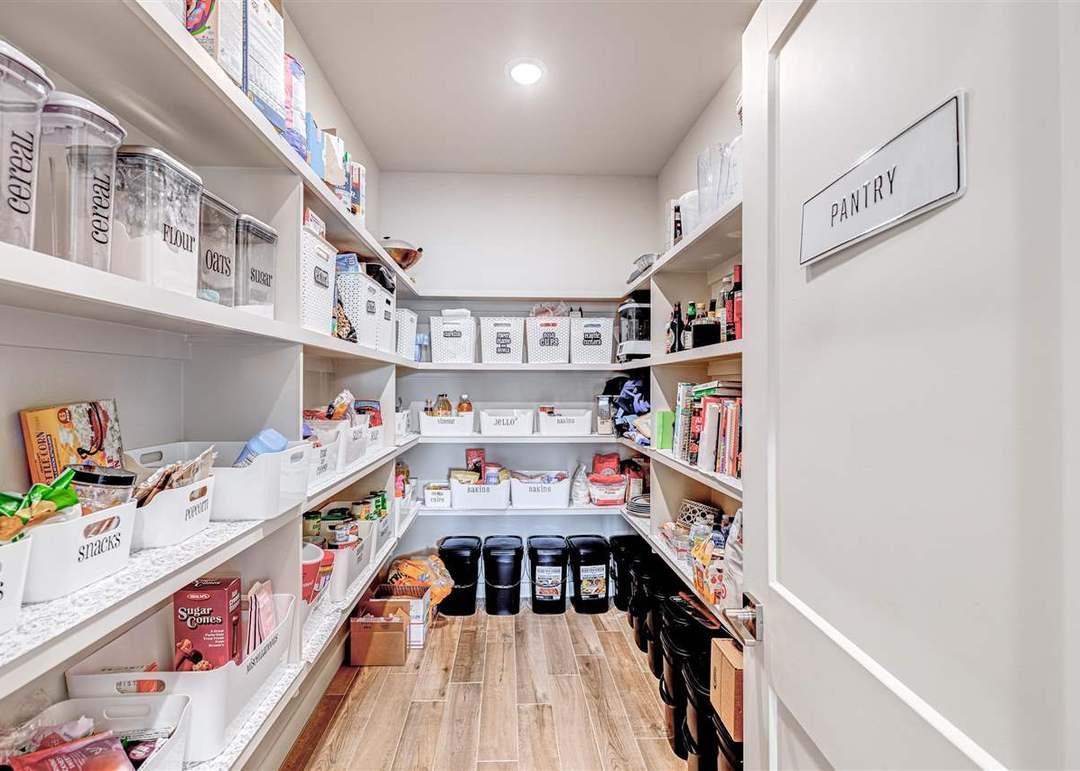
Labels turn a collection of containers into a repeatable system. I would label both containers and shelf zones when several people use the pantry, especially for foods that look similar. Current guidance from Martha Stewart and Good Housekeeping recommends clear labeling to identify contents and help household members return items to the right place.
- Container label: Name the food clearly and consistently.
- Zone label: Identify broader groups such as snacks, baking, or canned goods.
- Date information: Add relevant purchase or expiration information when transferring food from its original packaging.
Reserve Lower Shelves for Bulk and Heavy Items
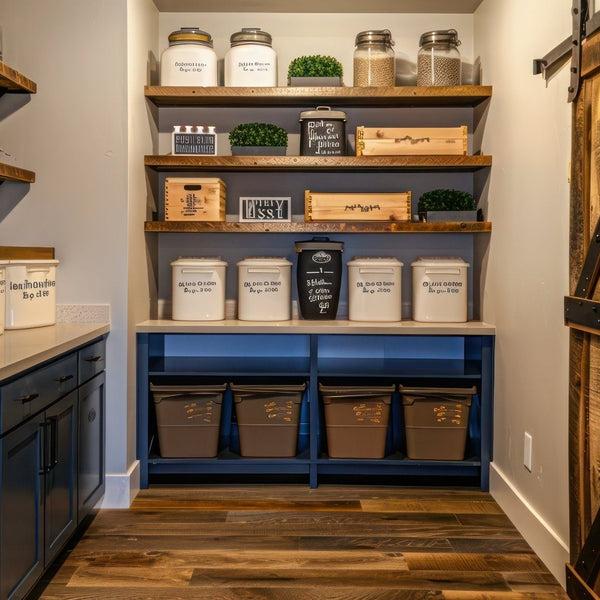
Lower shelves are practical for large bags, bulk staples, heavy bottles, and appliances because these items are easier to lift from a low position than from an upper shelf. Pantry designers commonly zone bulk and heavier storage lower down, while keeping everyday foods closer to the main working height.
A simple placement rule
- Eye level: foods used most often
- Middle shelves: everyday cooking and baking supplies
- Lower shelves: heavy and bulk items
- Highest shelves: seasonal or occasional supplies
That arrangement keeps the pantry practical rather than merely tidy. When every category has a sensible location, putting groceries away becomes a quick reset instead of another organizing project.